If you’re looking for a birthday party idea that’s equal parts fun, creative, and surprisingly easy to pull off—let me introduce you to your new best friend: the slime station.
Of course this is inspo is geared towards girls. You could easily do the same for a boys party with these minor tweaks : change the colors, change the font, add different size googly eyes & fake insects.
It’s hands-on, a little messy (okay, a lot messy), and keeps kids entertained way longer than you’d expect. Plus, it doubles as both the activity and the party favor. Win-win.
Why a Slime Station is the Perfect Party Activity
Instead of planning multiple games or trying to keep a group of kids on schedule (good luck with that), a slime station gives them the freedom to create, mix, and play at their own pace.
Kids love it because:
- They get to customize their slime
- It feels like a mini science experiment
- They can take their creation home
And you’ll love it because:
- It keeps them occupied
- Minimal structured planning required
- No need for separate goodie bags
How to Set Up a Slime Station
What You’ll Need:
- Clear glue (gallon size if you’ve got a crowd).
- Liquid activator (saline solution + baking soda or pre-made activator)
- Mixing bowls or disposable cups
- Spoons or craft sticks
- Add-ins (this is the fun part, pick a few items):
- Glitter
- Foam beads
- Food coloring
- Mini charms
- Confetti
- Googly Eyes
- Fake Insects
- Small containers for kids to take slime home.
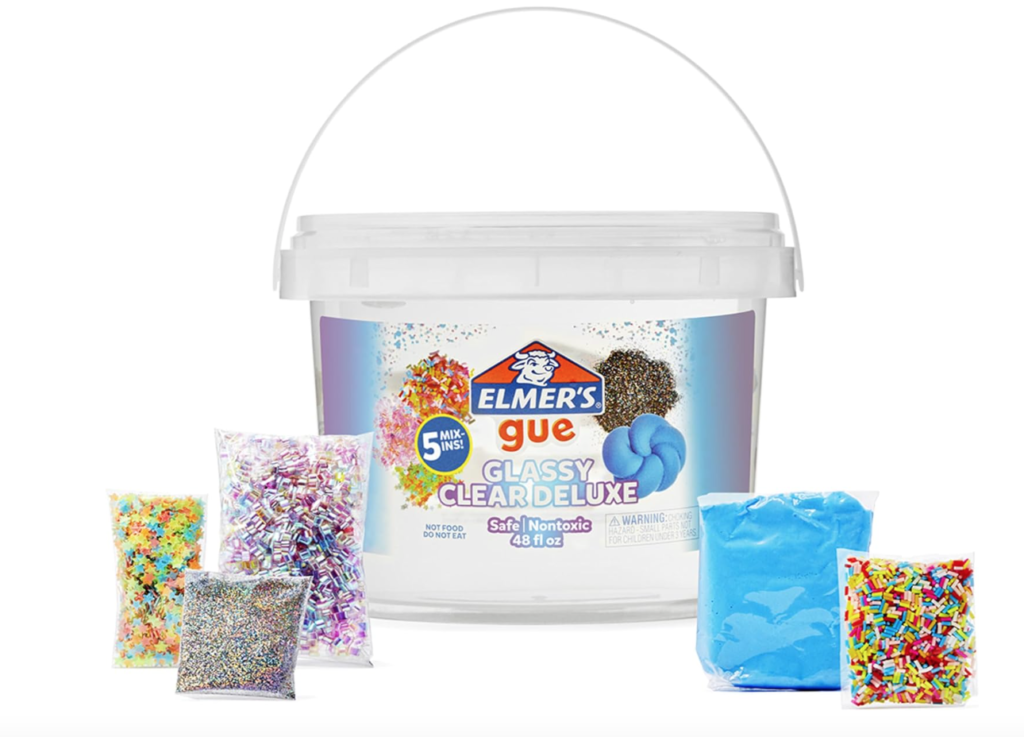
Mom Hack : Want a semi homemade version of the above ? Click this link Elmer’s Gue has a great slim kit ! (commissions earned). https://amzn.to/3Q1OeZ3
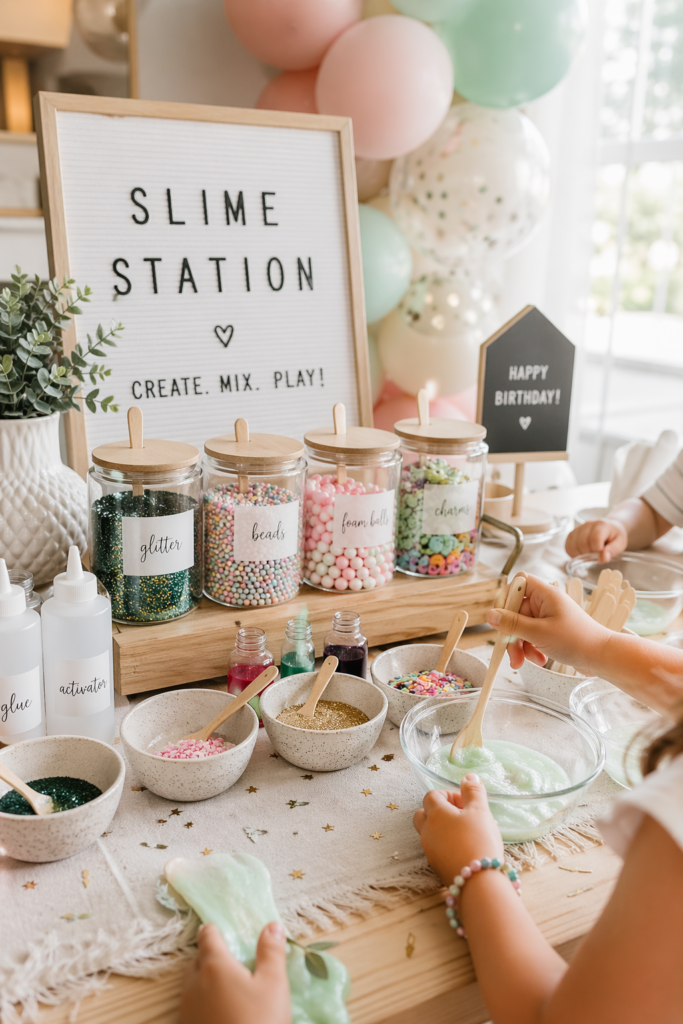
Create a “Slime Bar” Kids Will Go Crazy For
Turn your setup into a full-on slime bar moment (hello, Pinterest photos 📸).
Use:
- Mason jars or clear containers for add-ins
- Cute labels like “Unicorn Dust” (glitter) or “Magic Beads”
- A simple sign that says “Create Your Slime”
You don’t need to go overboard—just a few thoughtful touches make it feel intentional and fun.
Embrace the Mess (Strategically)
Let’s be real—slime and spotless homes don’t coexist.
Here’s how to stay sane:
- Set up outdoors if possible
- Or use a tablecloth + drop cloth combo indoors
- Have wipes and paper towels within arm’s reach
- Consider having kids wear old clothes (or give a heads-up to parents, write ” Slime Station” on invitation)
Keep It Simple (Seriously)
You don’t need a packed schedule. The slime station is the party.
If you want to add a little structure:
- Start with slime-making
- Break for cake and snacks
- Let kids go back to playing with their slime
That’s it. Done.
Easy Snack Ideas to Match the Theme
Keep the food low-effort but on theme:
- “Slime juice” (green punch or juice boxes)
- Cupcakes with green frosting
- Popcorn in labeled cups
- Fruit skewers (for a tiny healthy balance)
Let Kids Take Home Their Creations
Instead of traditional party favors, let their slime be the takeaway.
Set up a little “packaging station” with:
- Small containers with lids
- Stickers or labels so kids can name their slime
It’s personal, fun, and one less thing for you to prep.
Final Thoughts
A slime station birthday party hits that sweet spot of fun, creativity, and low-pressure planning. It’s not about perfection—it’s about letting kids get a little messy, a little creative, and have a lot of fun.
And honestly? Watching them light up when they make their own slime is worth every glitter spill.
How to Make Slime
This is just a few ingredients, quick to mix, and super kid-friendly.
Ingredients:
- 1/2 cup clear school glue
- 1–2 tablespoons slime activator (linked above )
- Food coloring (optional)
- Glitter, beads, or mix-ins
Step-by-Step Instructions:
1. Pour the glue
Add 1/2 cup of glue into a bowl.
2. Add color + mix-ins
Stir in food coloring and let kids add glitter, beads, or confetti.
3. Add activitor
Slowly add 1 tablespoon of activator ( double check measurements on your bottle )
4. Mix until slime forms
Keep stirring—the slime will start to pull together and away from the bowl.
5. Knead the slime
Once it’s formed, knead with hands for 1–2 minutes until smooth.
Troubleshooting:
- Too sticky? Add a little more liquid activtor(a few drops at a time)
- Too stiff? Add a small amount of glue and knead
- Not coming together? Keep mixing—it usually just needs more time
Mom Tip for Parties
Pour activator into small squeeze bottles so you can control how much each child uses—this prevents over-pouring (and slime disasters 😅).